How I made The Daily Star News AI Video
Disclaimer: *This is a demonstrative exercise to showcase the capabilities of AI, using The Daily Star merely as a reference. This experiment is not affiliated with or endorsed by The Daily Star.*
Ever since the release of GPT-4 March of this year, the rapid progress of Artificial Intelligence or AI has intrigued me. Eager to explore more, I experimented with various AI tools and, after some research, created the following fully AI generated video. No studio or presenter or camera or coding required, and the whole video is done without spending any money.
This video is inspired by a real news article from The Daily Star. On December 2020, we won the very prestigious Daily Star ICT Awards 2020. The Daily Star published an article on the front page of the newspaper. Since I am in the article, I have chosen this as test case.
https://www.thedailystar.net/frontpage/news/tech-heroes-triumph-the-time-pandemic-2019257
Point to be noted that I am no expert on video content creation. So if I have managed to achieve this, so can you! In this article, I am going to show you step by step how to create your own AI generated video starting from your own AI related YouTube channel.
Step 1: Create new YouTube channel
If you already know how to do this, then skip this step.
- Go to Youtube.com and login if not already.
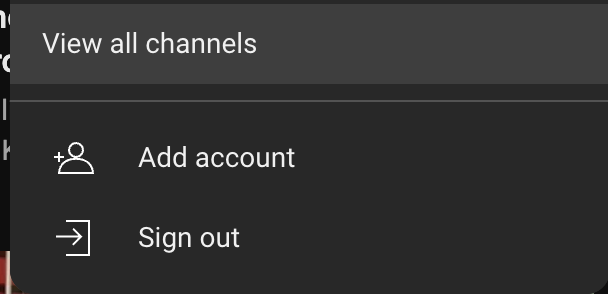
- Click on: your profile pic→ switch account→view all channels→ create a channel button. On next screen input channel name, I used “The Daily Star AI Video News”


3. After channel creation, click on Customize channel button and go to Basic info section. Change the channel name, handle and description as you seem fit. I generated the channel description from ChatGPT (https://chat.openai.com/).

4. Now let’s go to the branding section and create a logo and a banner image for our new channel.
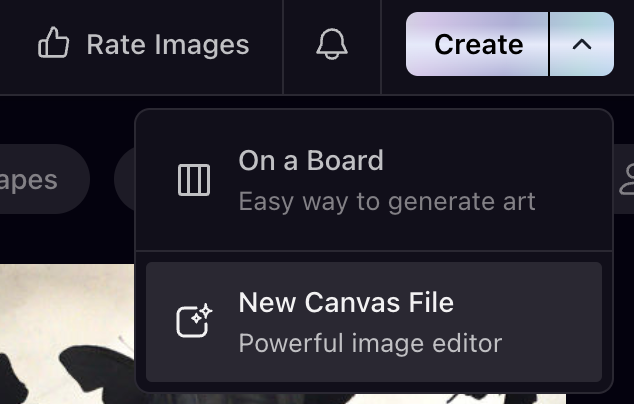
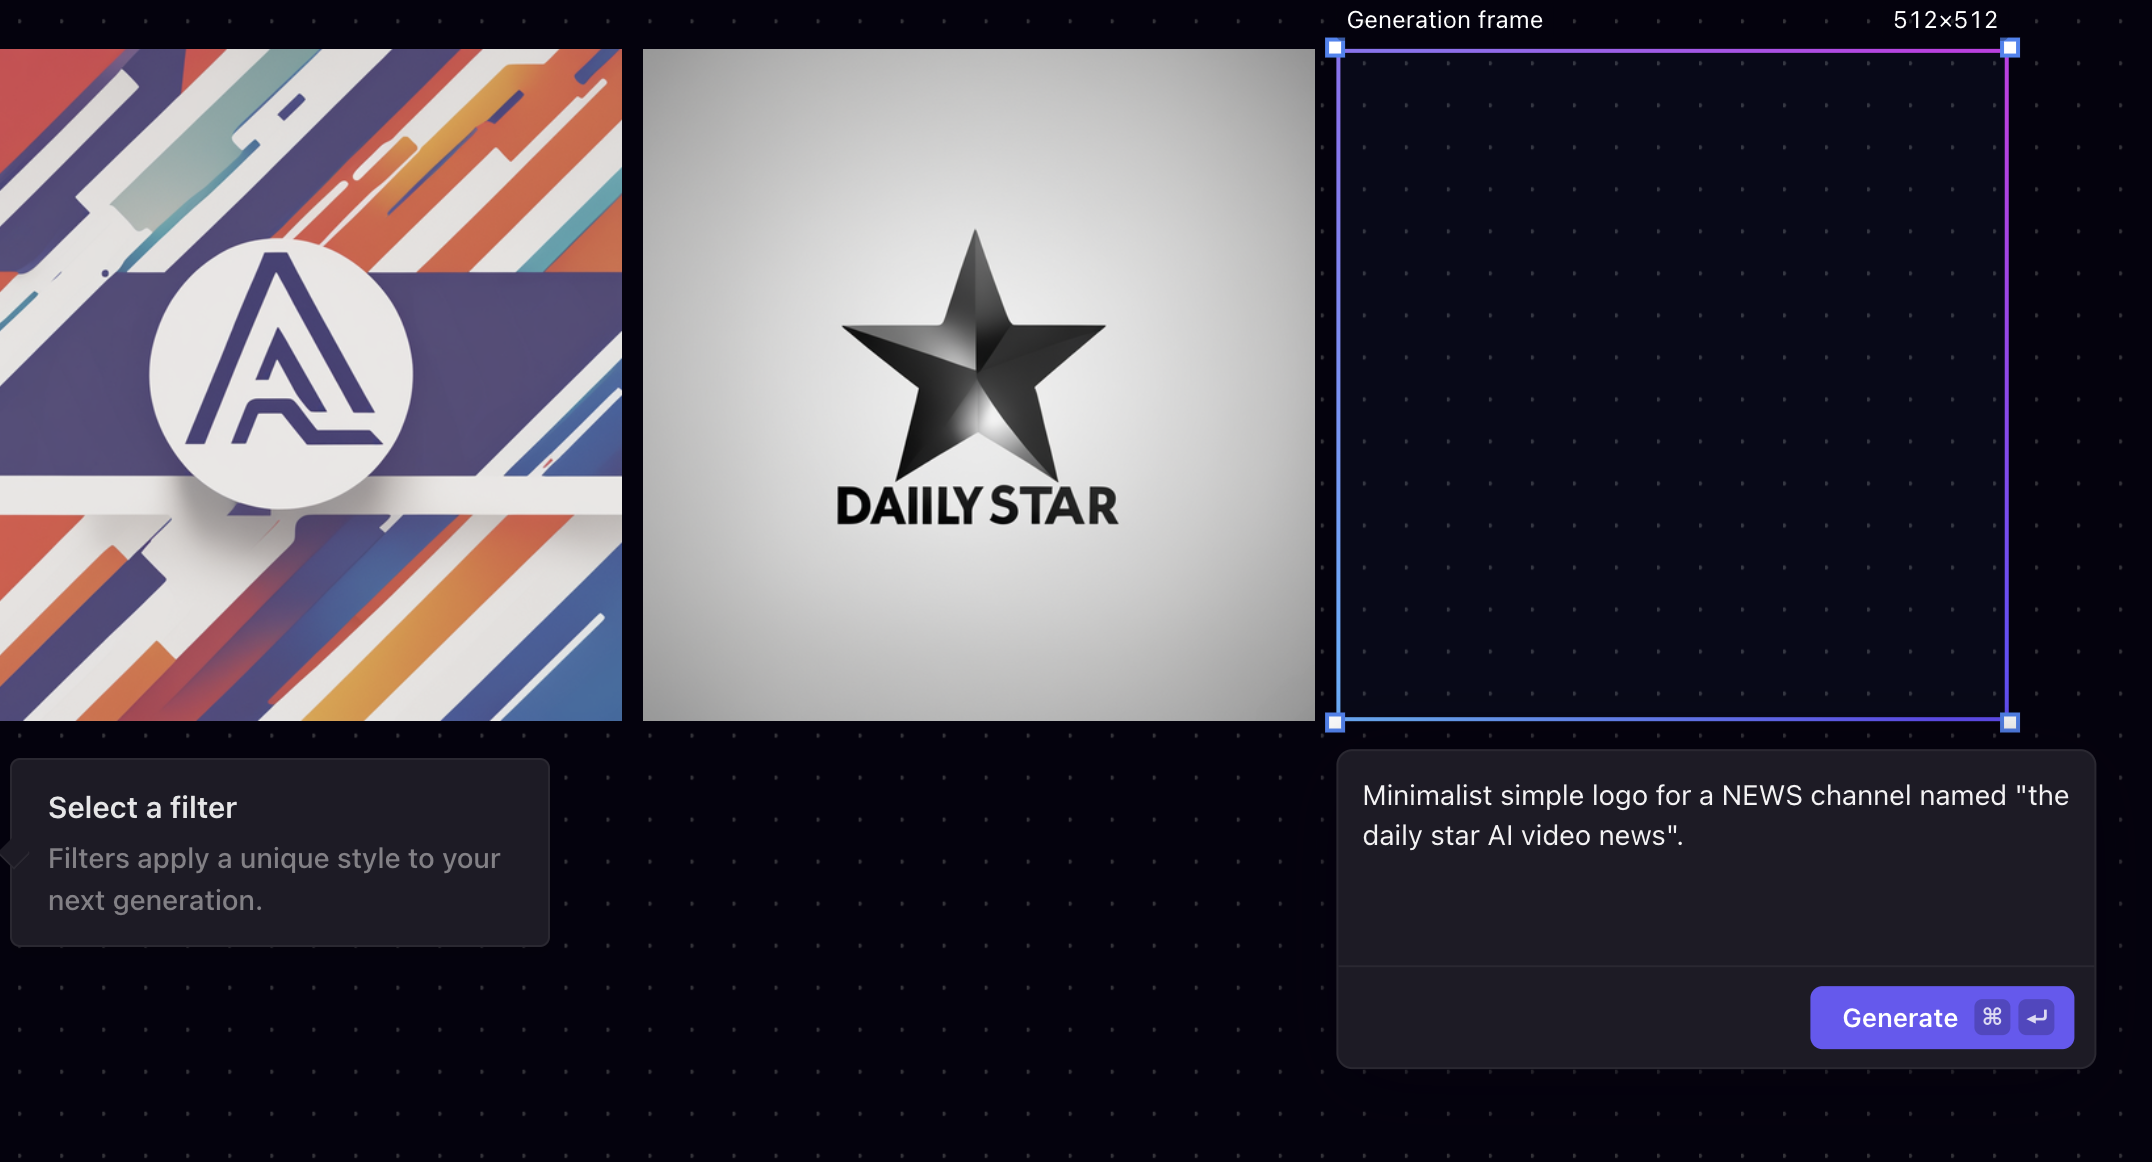
For logo, we will use playgroundai.com
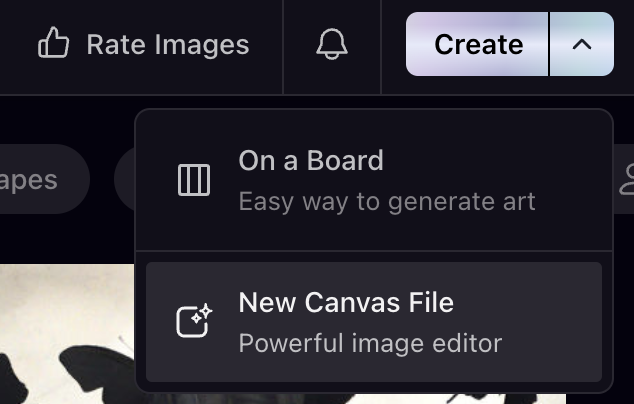
- Click on create button→ New Canvas file
- Then type a prompt and then click generate. I used the prompt “Minimalist colorful logo for a NEWS channel with a star”. If you don’t like what you see, change the prompt and click generate again.
- Right click the image you like and click on download.
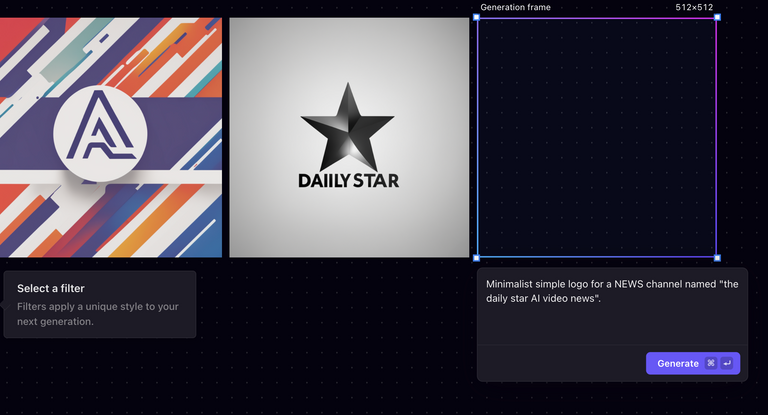

So now you have your AI generated logo.

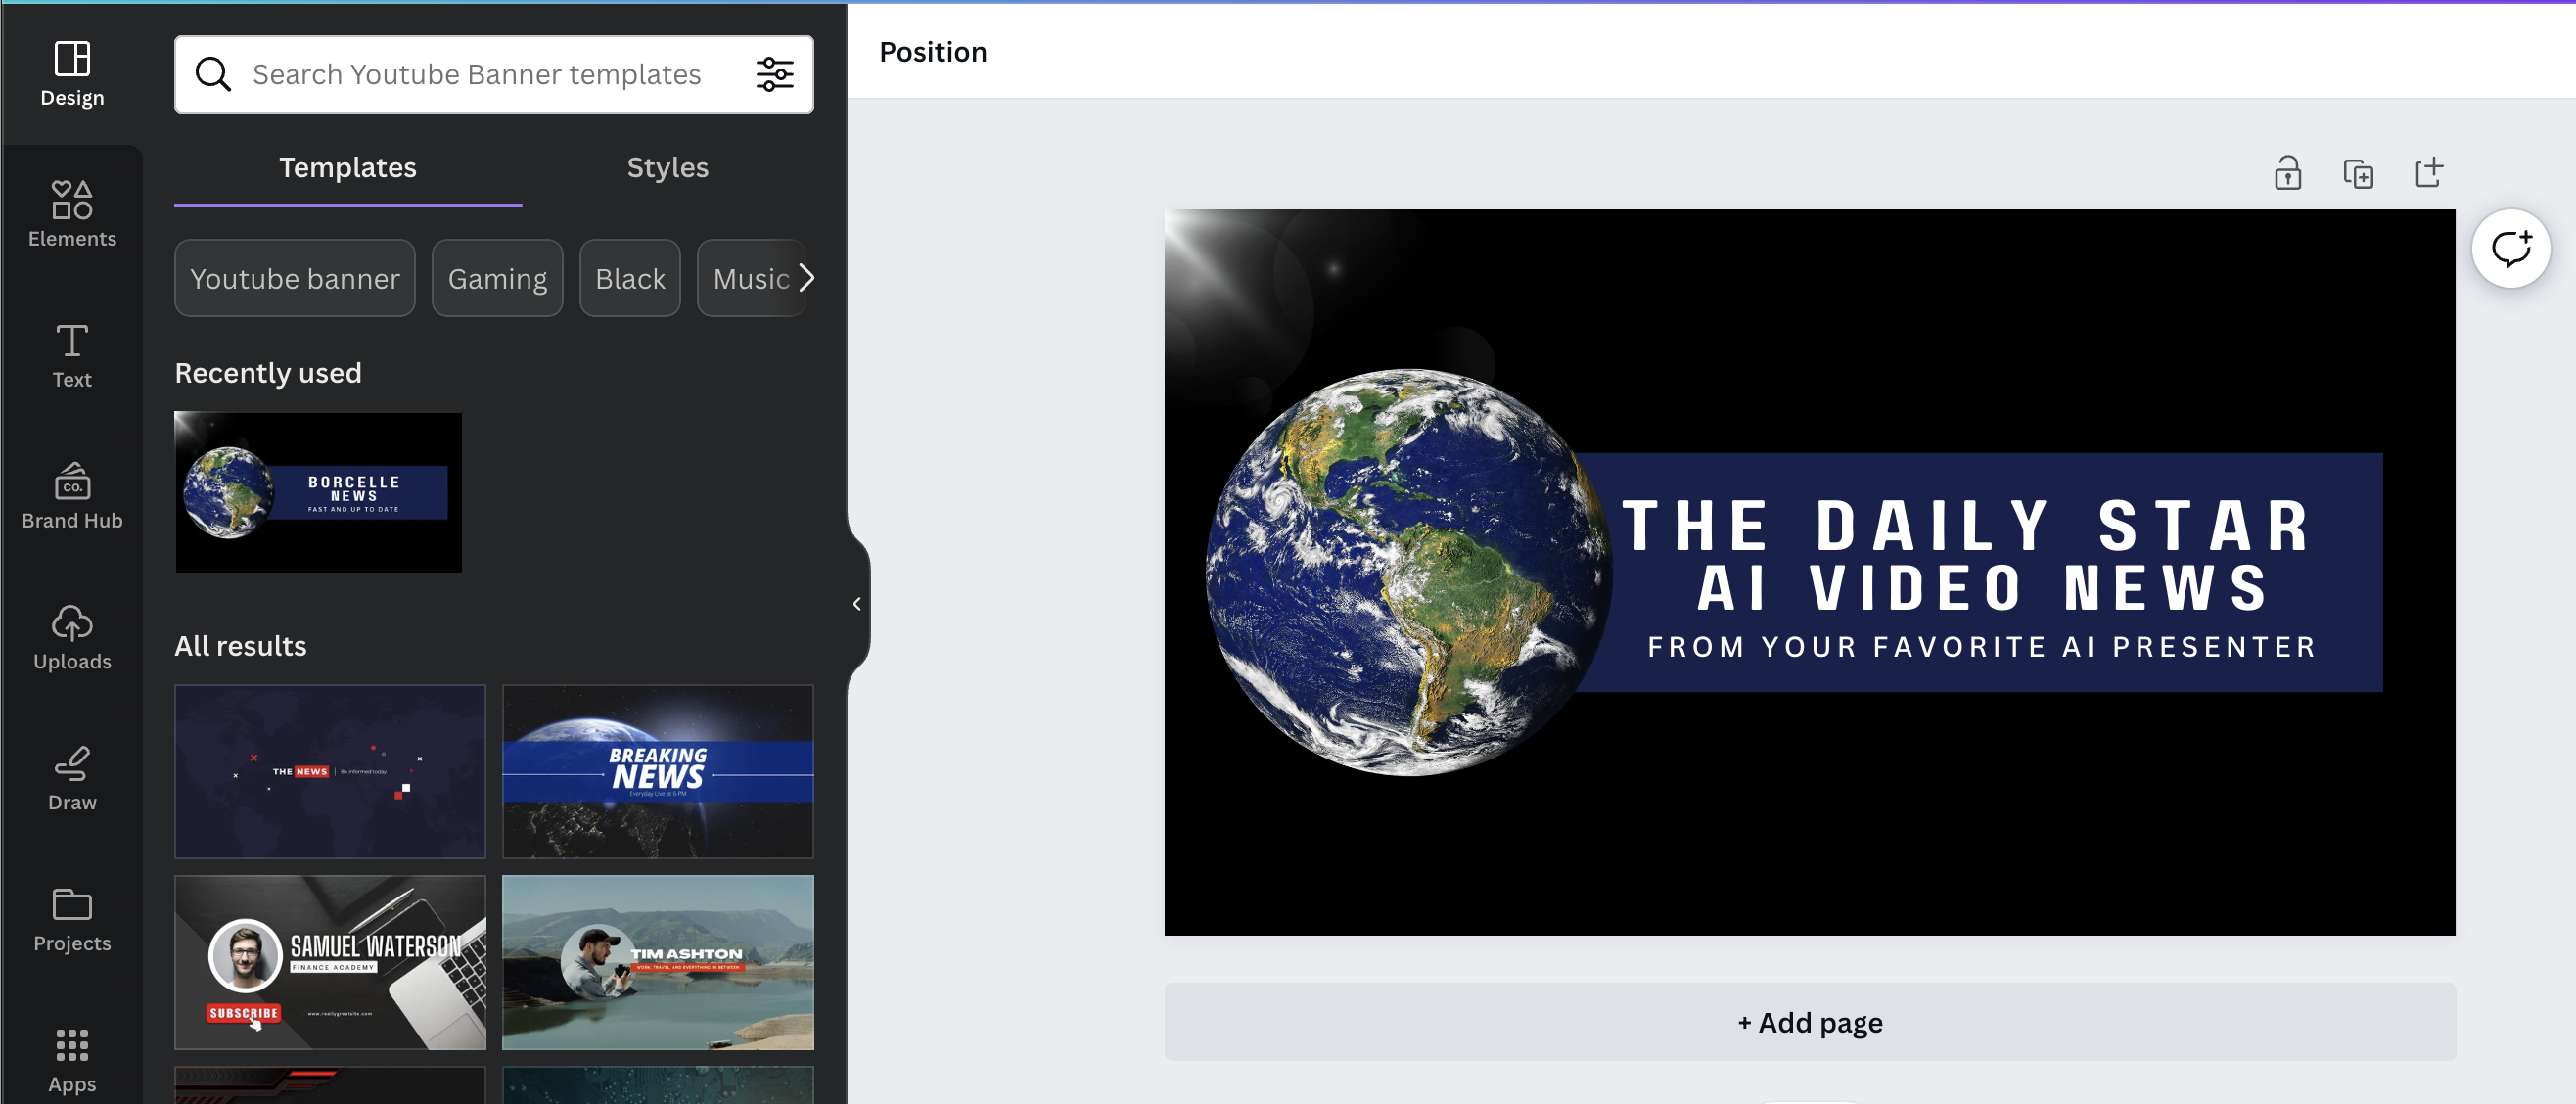
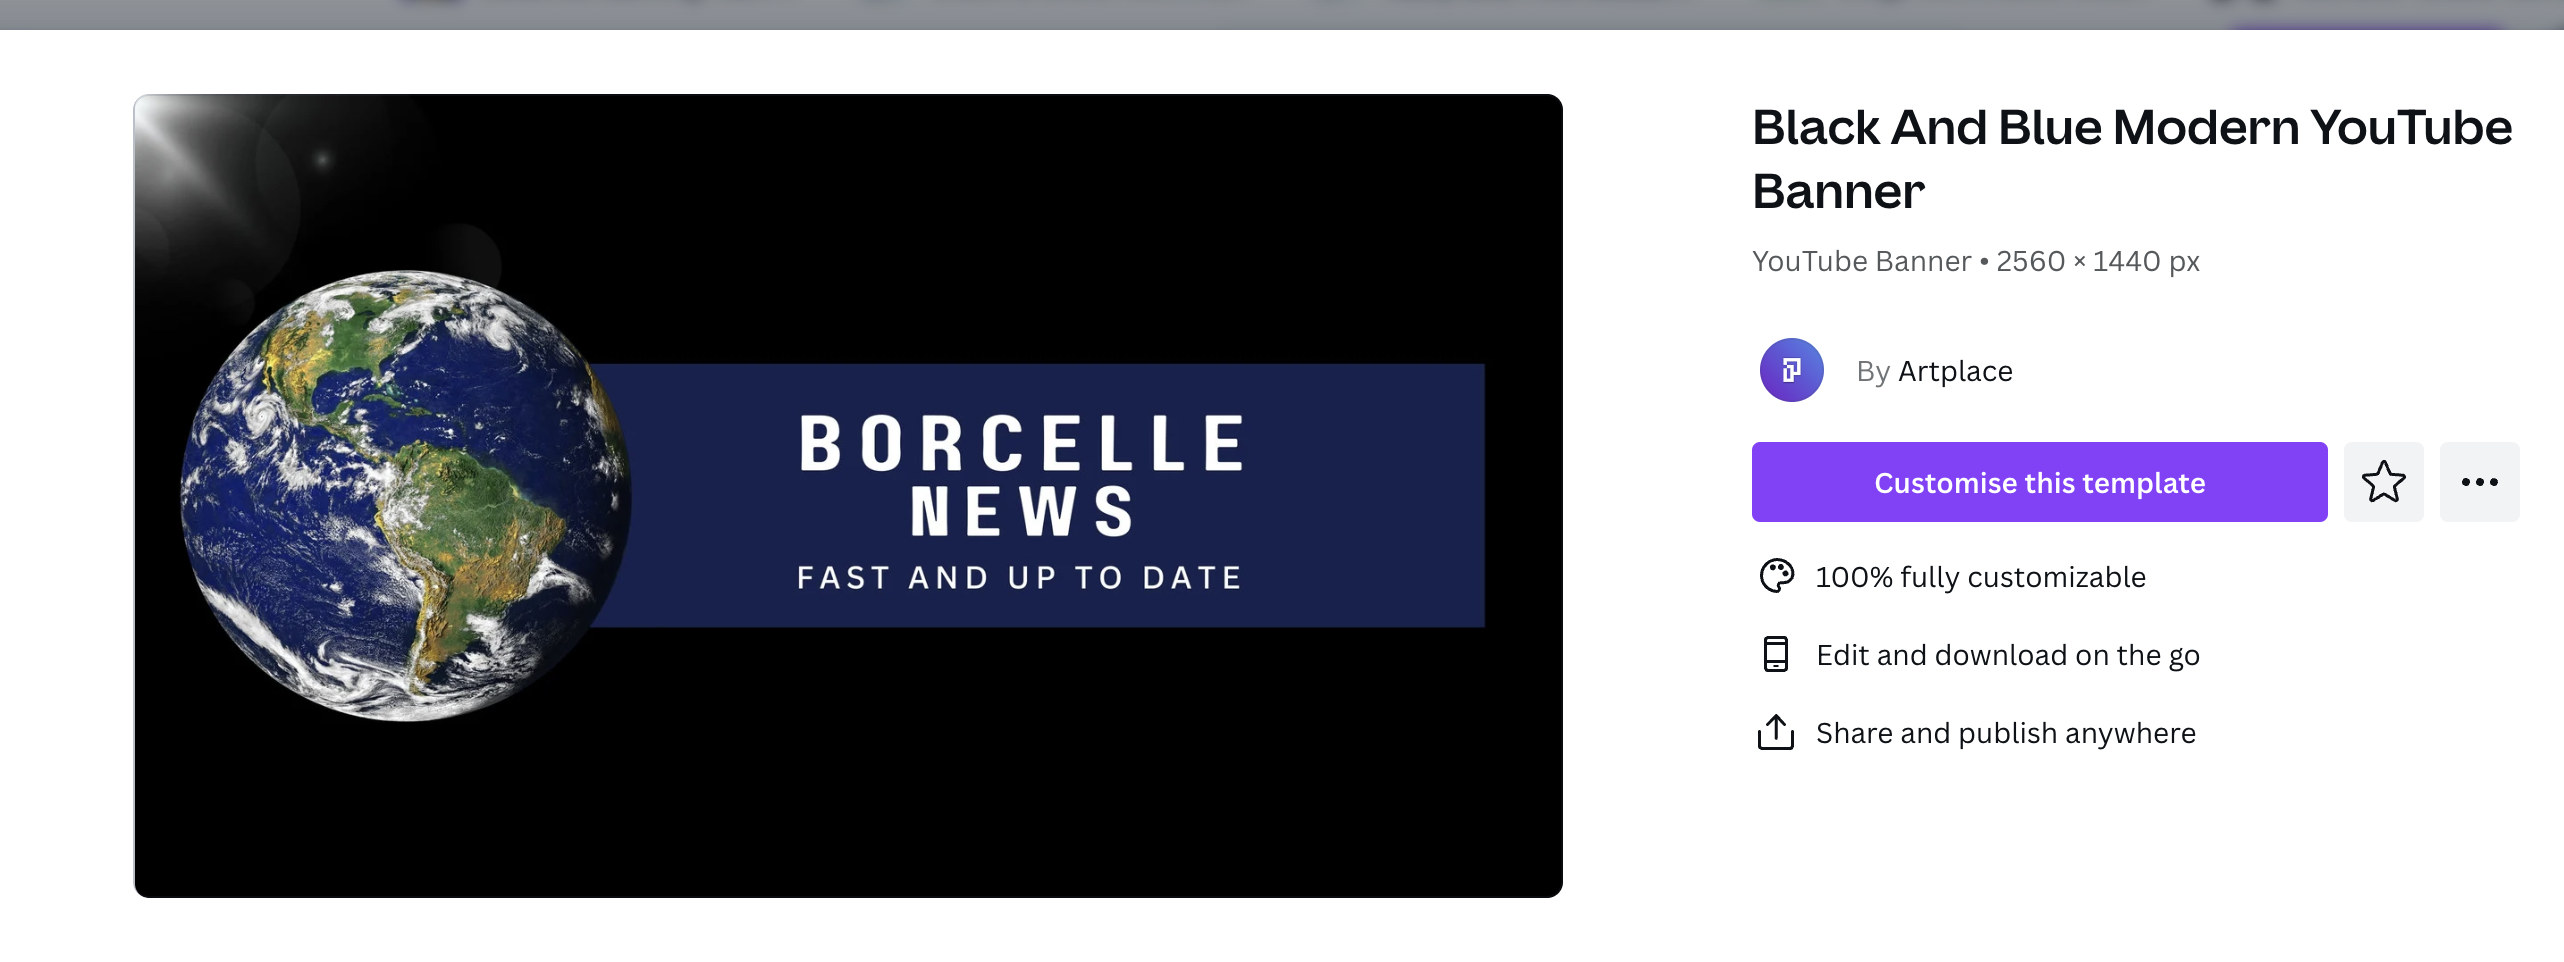
b. Next let’s create a banner image for the channel, I used https://canva.com
- Once you login, search “youtube banners” and choose a template.
- Click on customise this template and change however you like in the design
- Click on share, then download.

5. Now let’s go back to our youtube channel Customization → branding section and upload the logo and banner.
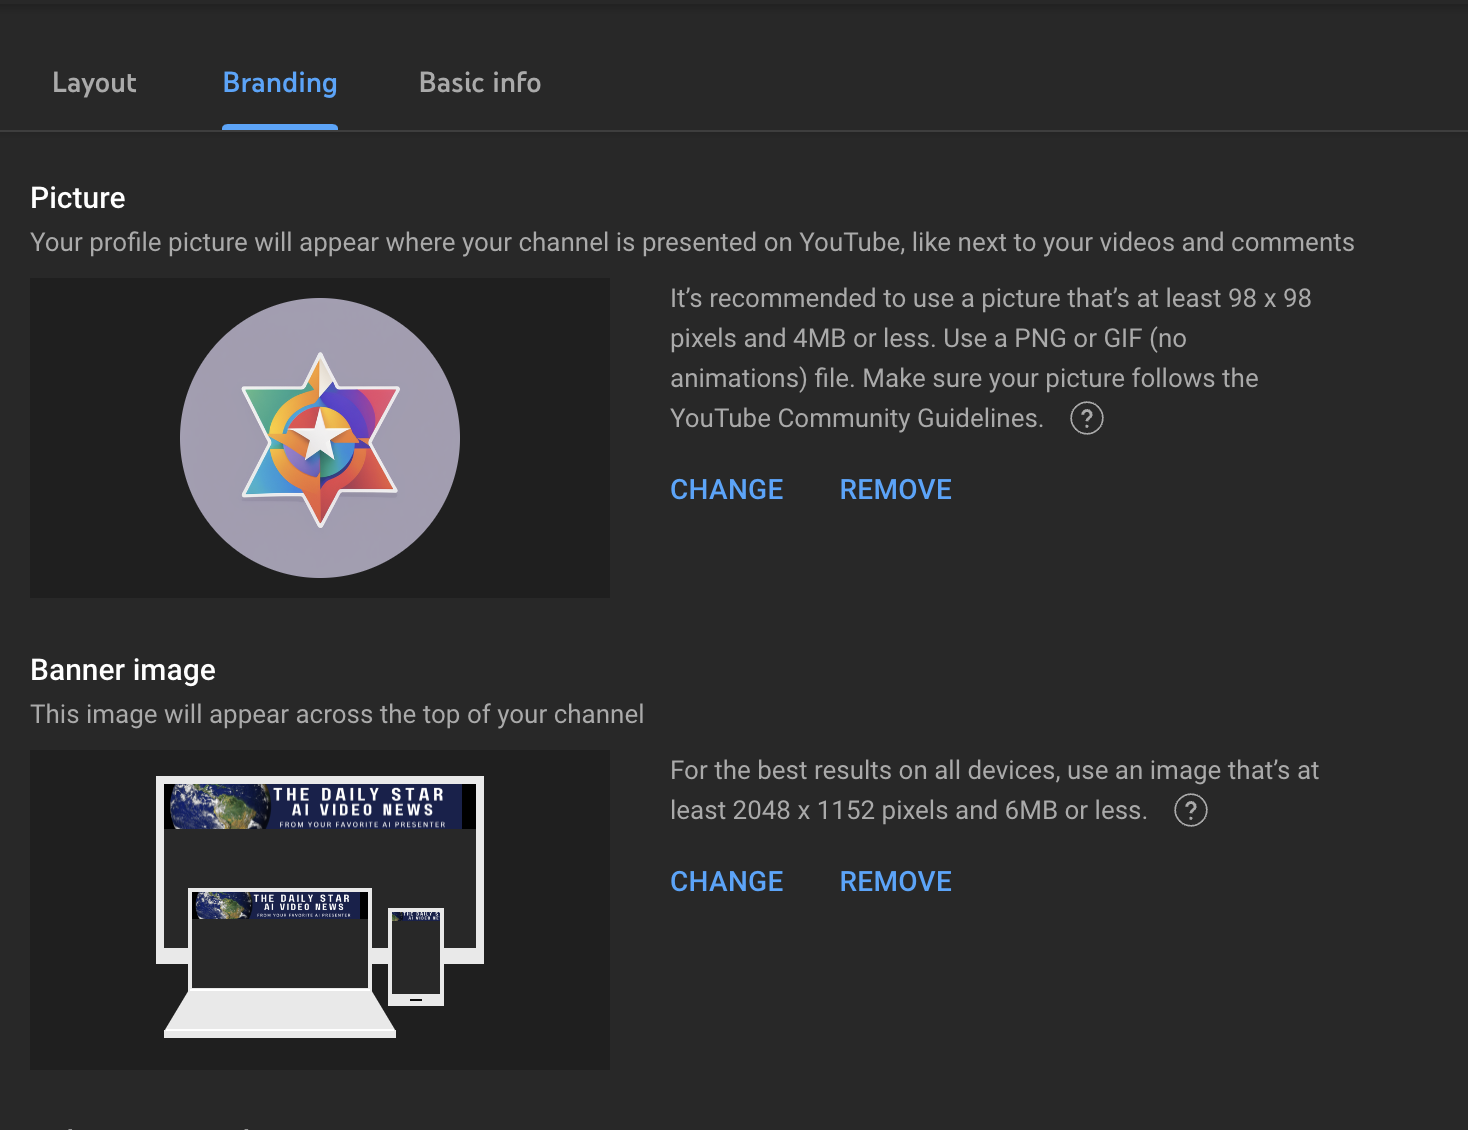
And then click Publish. Great, now your YouTube channel is ready for video upload.
Step 2: Create Voiceover
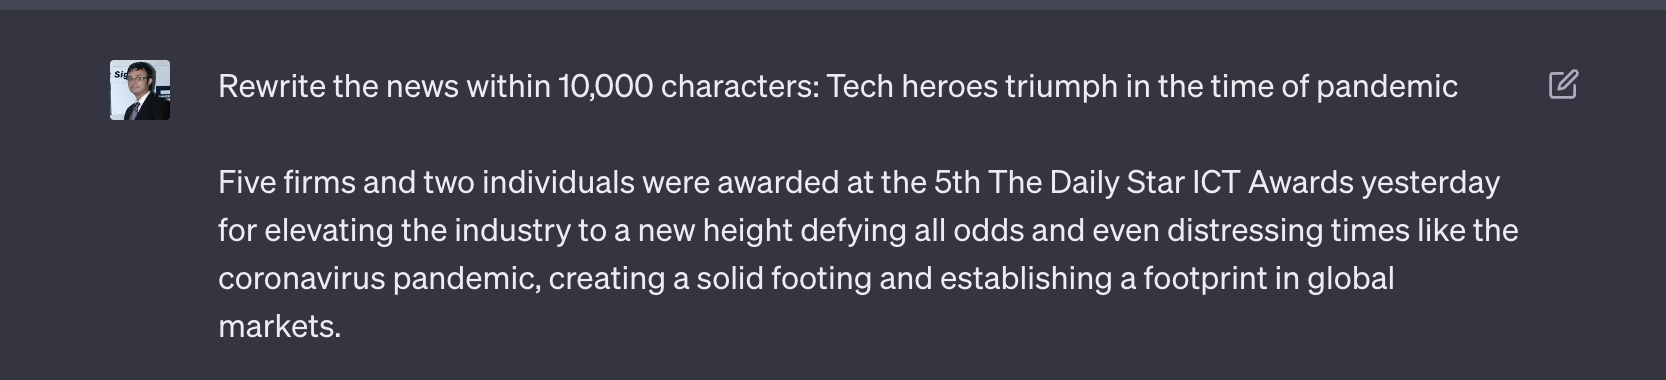
Let’s pick a news article for the voice over. So I am going to use https://www.thedailystar.net/frontpage/news/tech-heroes-triumph-the-time-pandemic-2019257
You can choose any article you like. Copy the texts from the article.
Since the article is long, I made it shorter with ChatGPT. So go to https://chat.openai.com/ and you can use a prompt such as: Rewrite the article within 1000 characters. Make it voice over ready. Here is the article: (pasted article). ChatGPT will summarize for you. The reason why I have chosen 1000 character limit because if we want to use the free tools we have to make the voice over less than 1 minute.
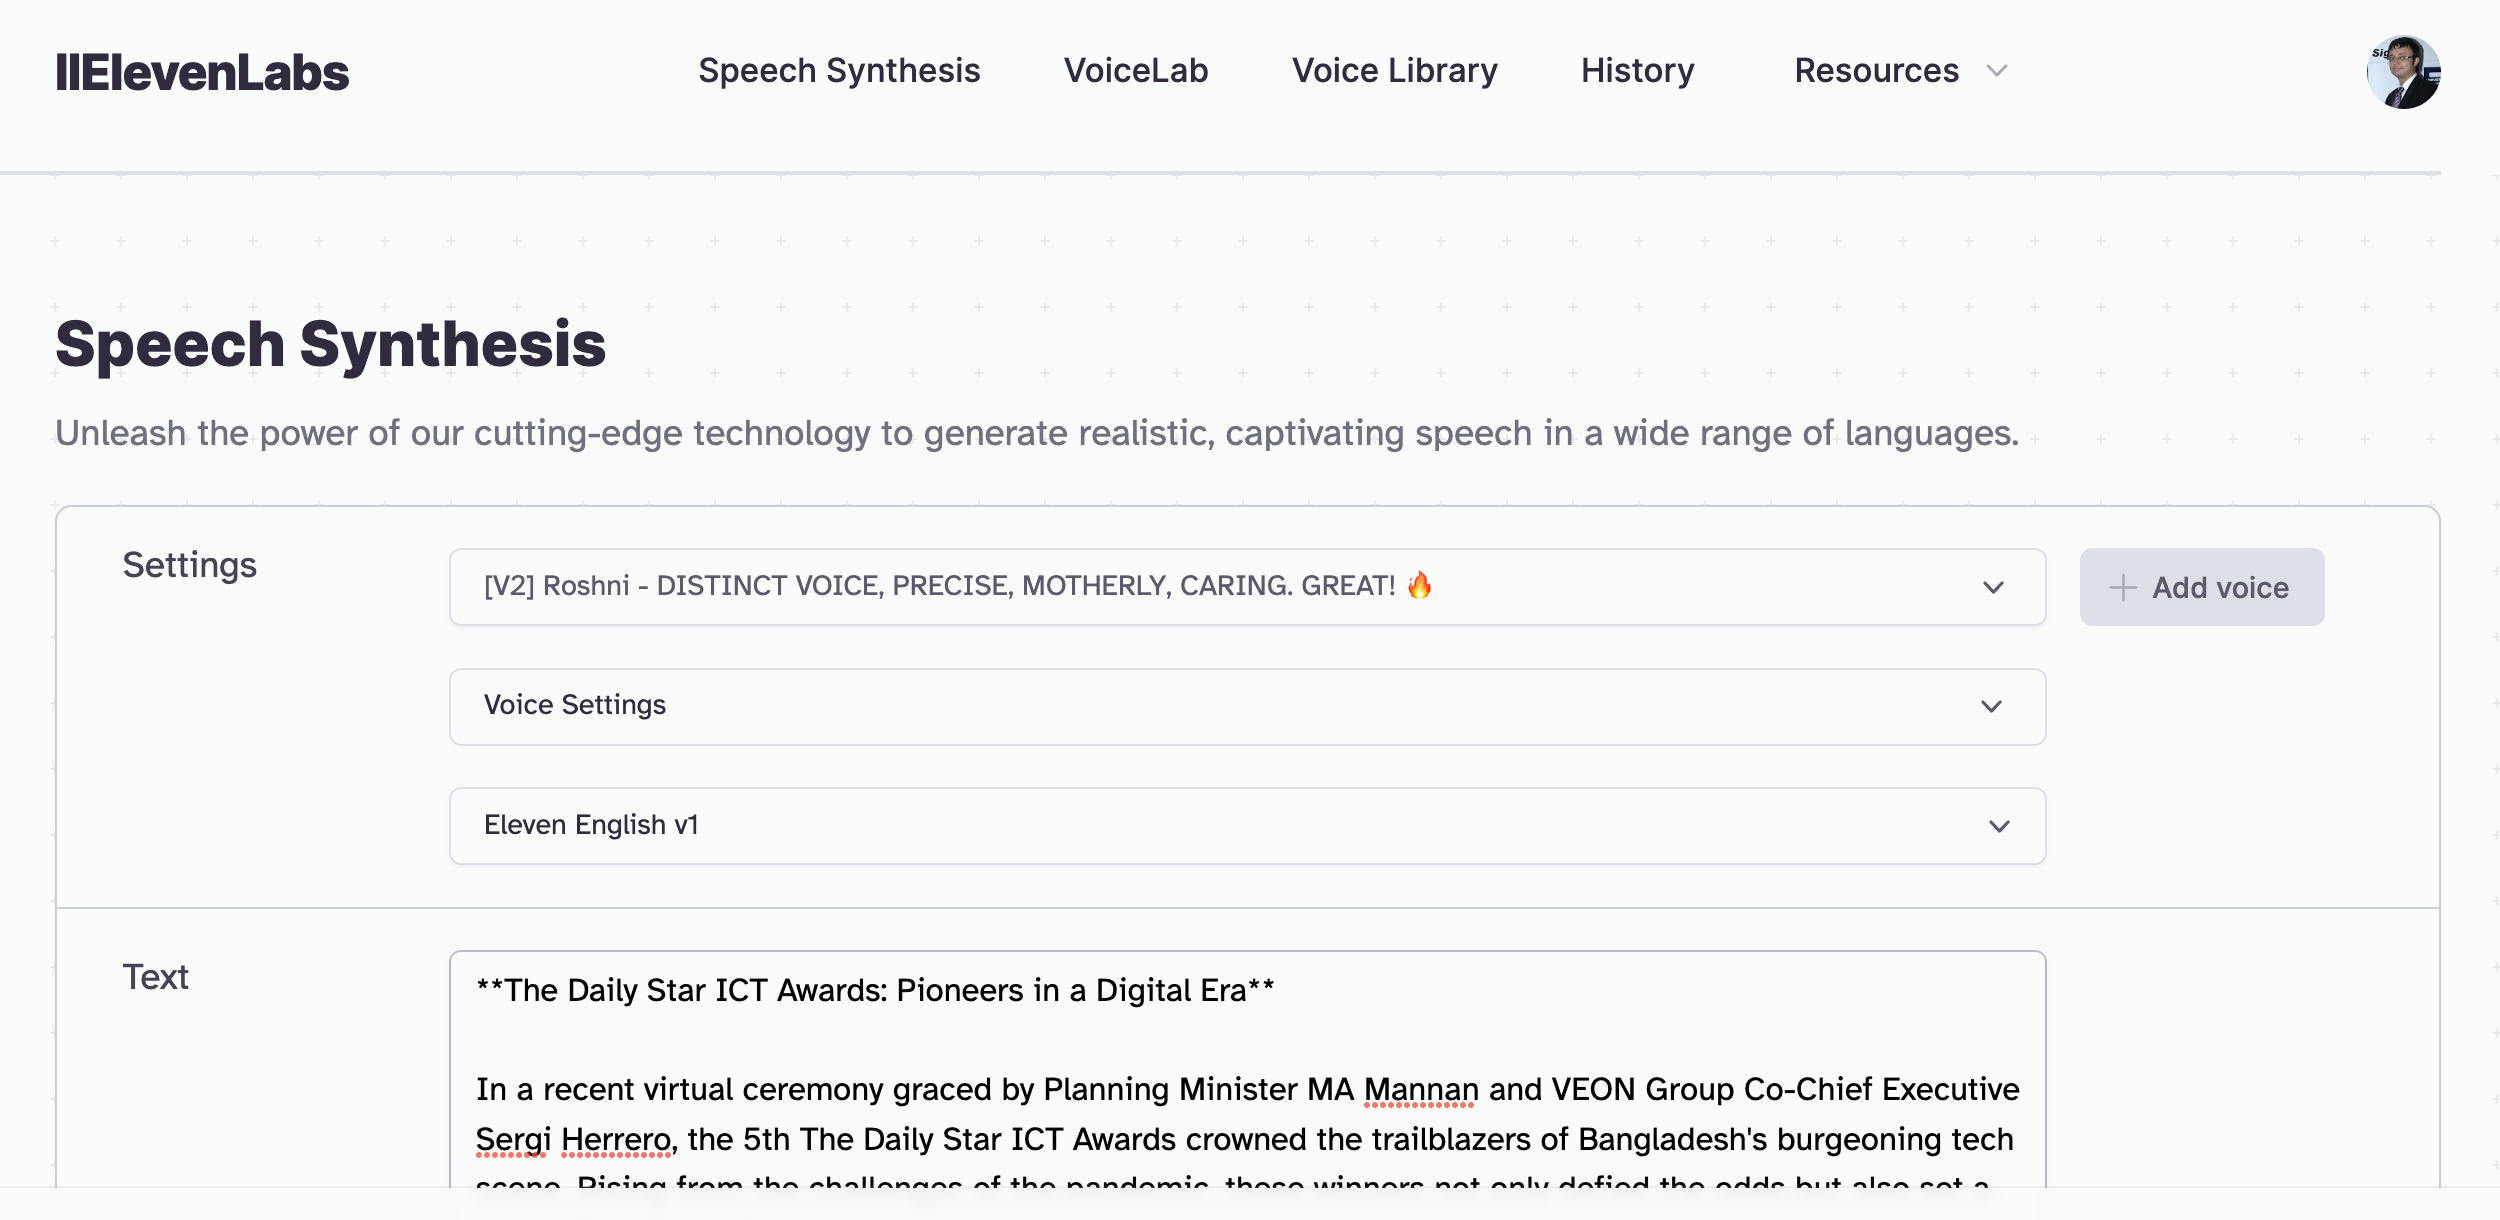
Next we will go to elevenlabs.io. This is the site where we will convert text to speech.
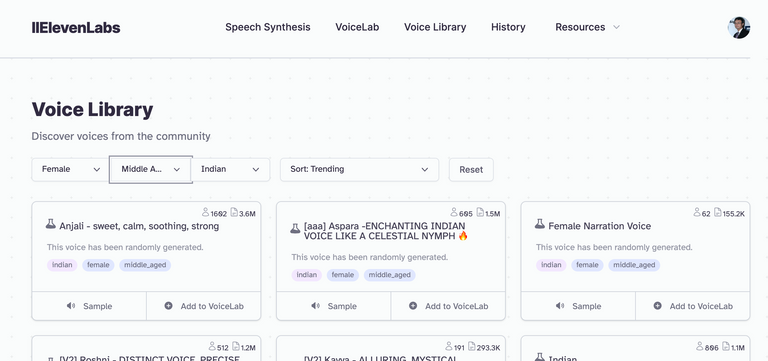

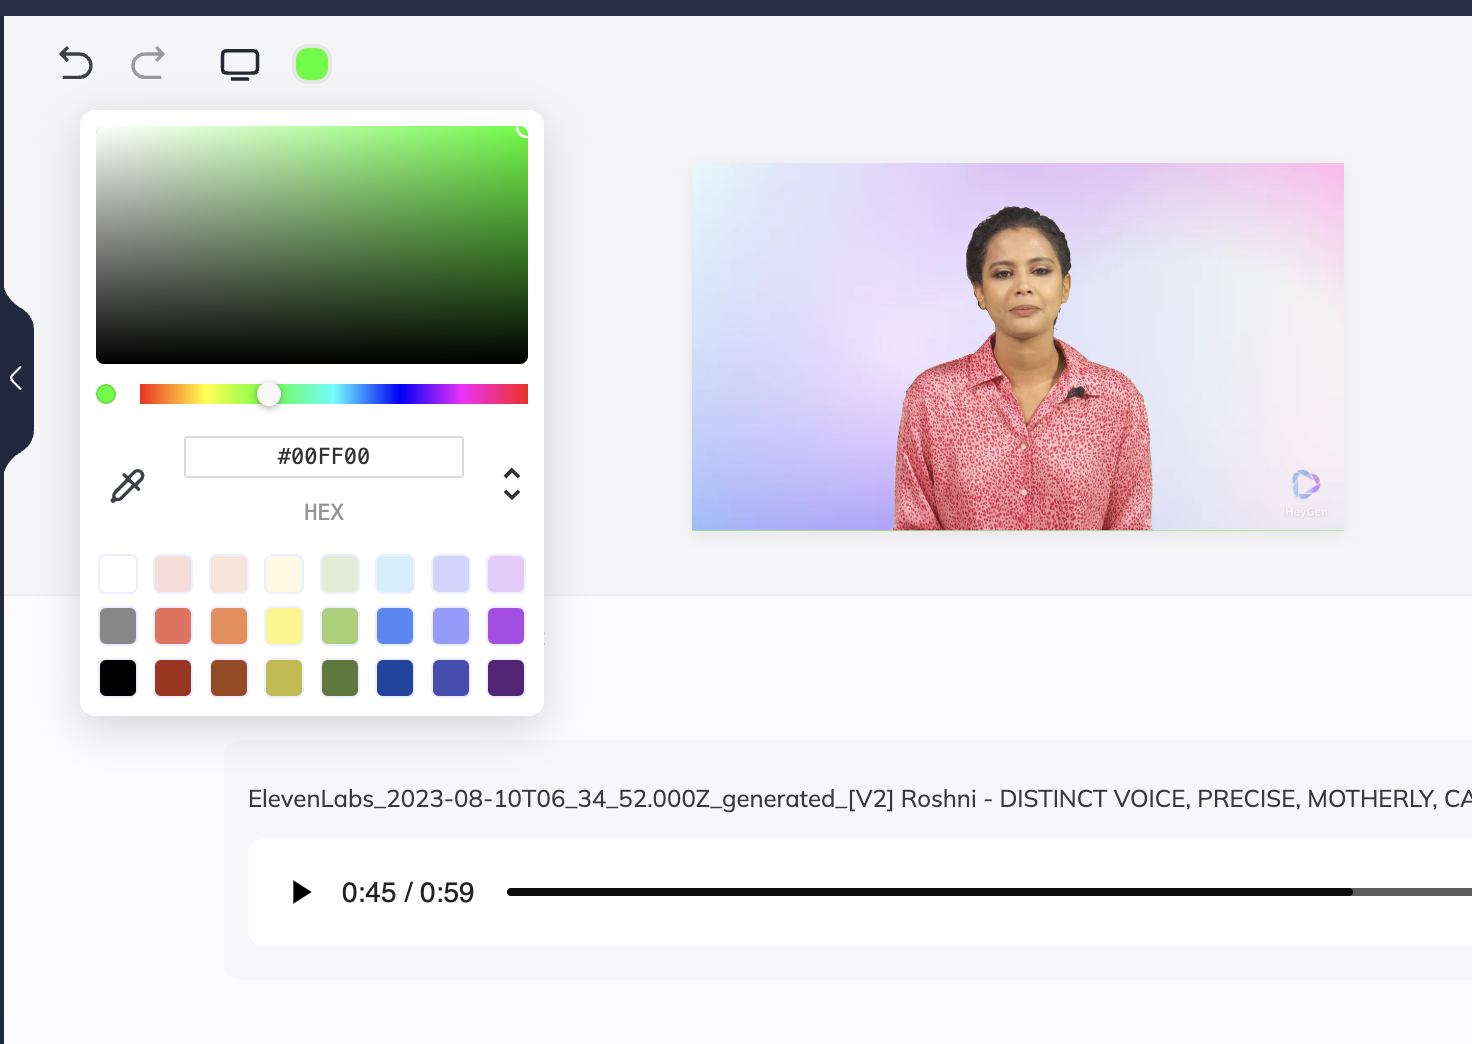
After sign up, head to the VoiceLab section. You can choose different voices from here. They have one of my favorite Scarlett Johansson’s voice as well. Anyway, I have filtered with female, mid age and Indian and have chosen a voice named Roshni. You can play around and choose any voice you like and add it. You can choose up to 3 in free version.
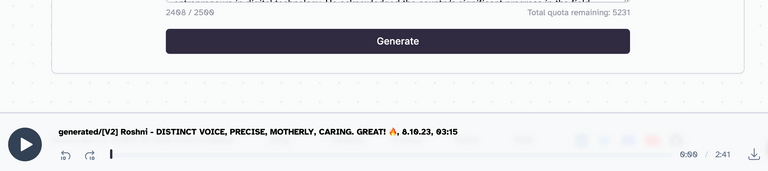
- Then head to Speech Synthesis from the menu. Choose the voice and paste the text summary copied from ChatGPT. Then press generate. Free version allows you to generate about 10,000 characters to voice. But you need to make sure the voice clip doesn’t exceed 59 seconds to use the free tools in next step.
- Once ready, download the mp3. Again make sure it’s not over 59 seconds. If it’s over that, use online tools like audiotrimmer.com to trim it to 59 seconds or less.


Fantastic! now you have your AI generated voice over ready for your video!
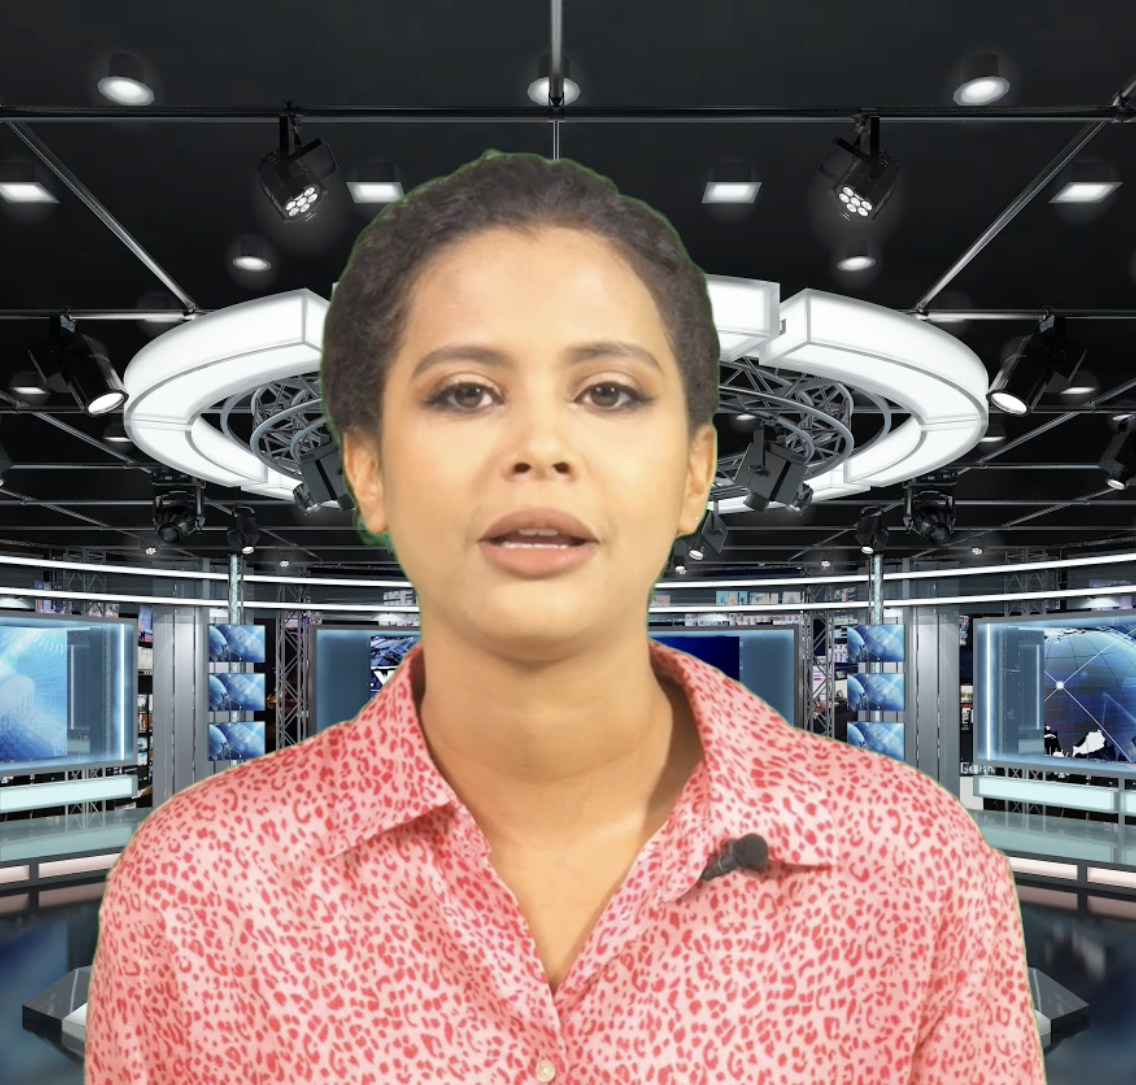
Step 3: Create AI Avatar
This is where we are going to get AI avatar for our video.


- Let’s head to heygen.com. Click on “Try Heygen for free” and then click on avatar menu on the left side.
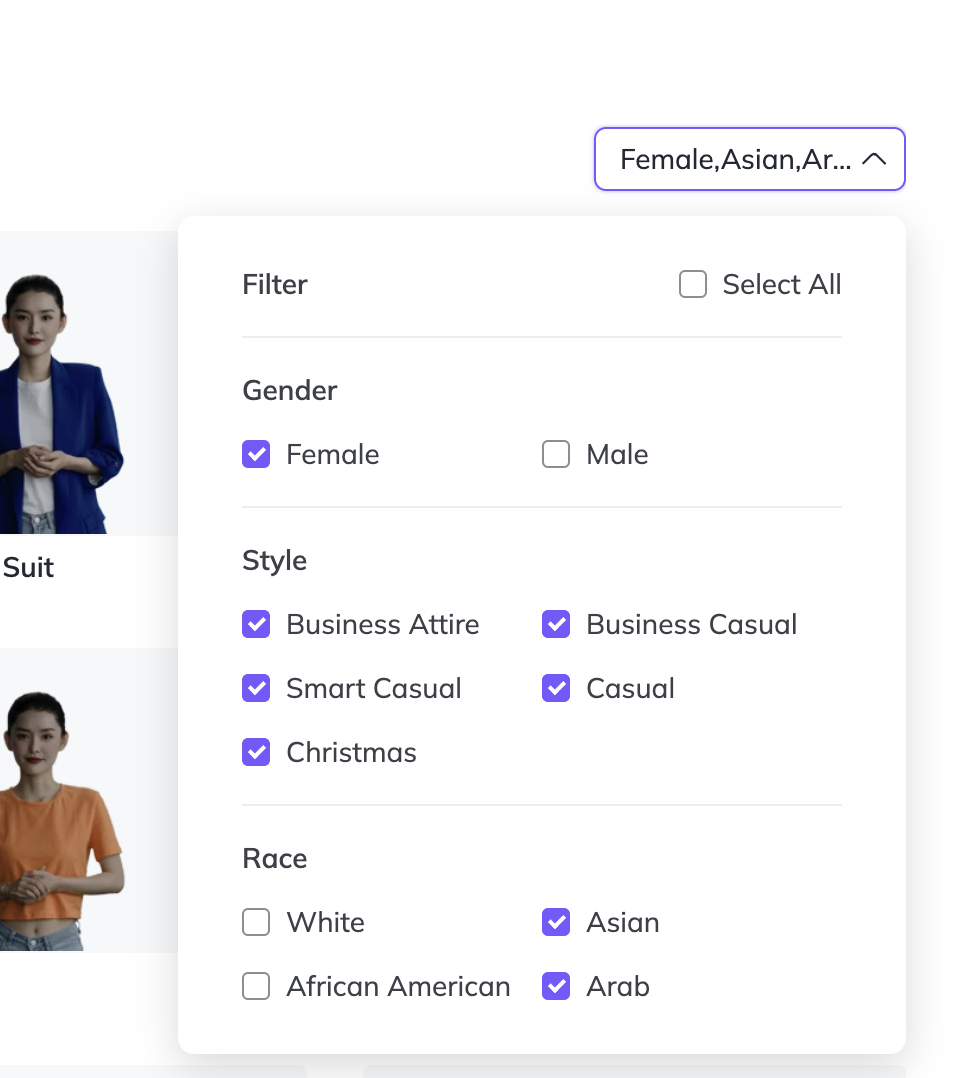
- Choose your avatar. From “all appearances” filter, I have unchecked male, white, African American and have chosen Luna in floral Shirt. You can play around with different characters and choose the one you like. Once chosen click on “Create video” in landscape mode. This will take you to edit screen.
- Go to “Audio Script” tab and drag or upload your mp3 file. The free version only supports 1 minute audio file. It will take a few moments to process your audio files.
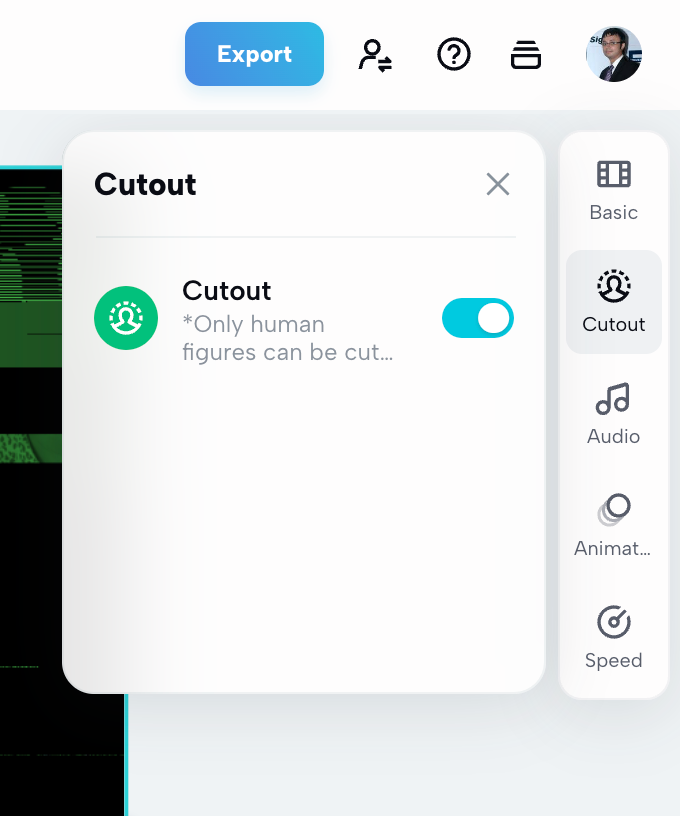
- If you want cutout of your avatar, meaning if you want changed backgrounds in your video, make the background color green. You will find the option at top menu when you select the video. If the background doesn’t go green, remove the previous background, you should see the icon for that at top.
- Once you are done, click on submit. It will take some time to have the video ready for download. Once it’s ready download it.
Awesome! now you have your AI generated AI avatar with AI generated voice over ready!
Step 4: Edit Video
We will do the video editing in capcut.com. Note that like me if you are a ChatGPT plus (paid) user, there is a quick way to generate video by using plugins. If you are not, don’t worry. You can directly go to capcut.com and edit your video. It will just take a bit more time and efforts.
- If you are a ChatGPT plus user, follow this:
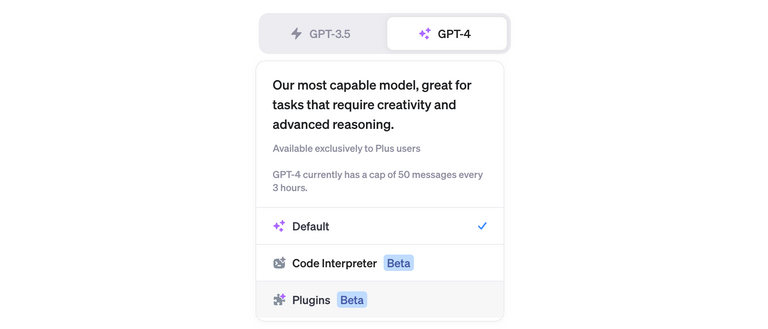
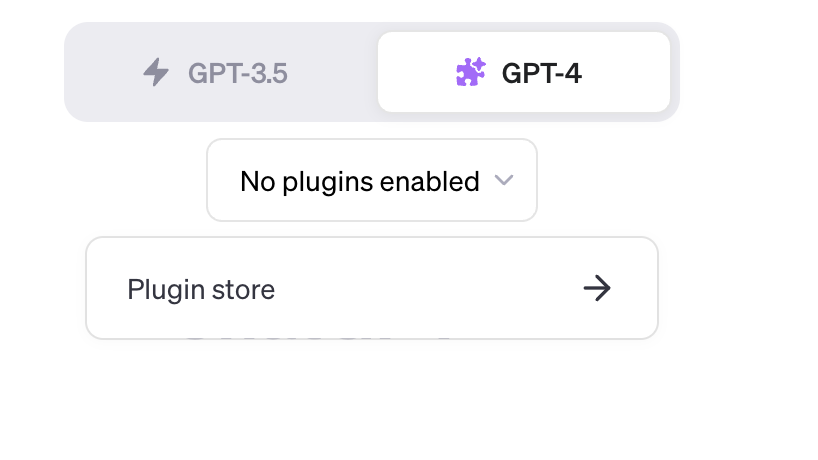
Select Plugins 
Go to plugin store 
Search CapCut Plugin 
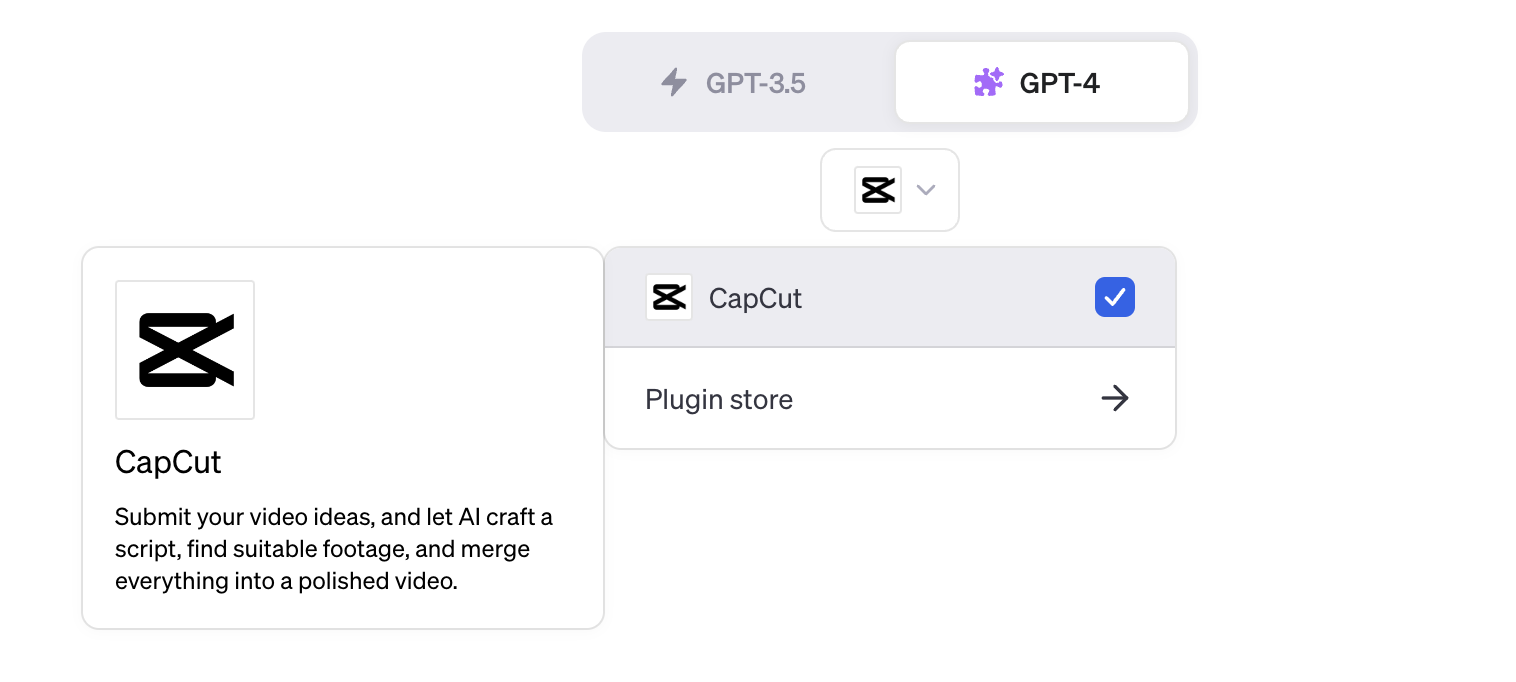
Correction: 1,000 words - Click on “New Chat”, from GPT 4 tab dropdown select plugins, from below the GPT 4 tab go to plugin store and search for CapCut and install it. If you don’t see the plugins option in GPT 4 tab dropdown, then go to Profile dot →Settings & Beta →Beta Features and turn on plugins. Note this is only available for ChatGPT Plus paid users.
- In prompt type: Make a video with this script: (Paste the script.). This will take a few minutes and will provide you with a video link in ChatGPT. Click on that link and it will take you to CapCut website where you will find auto generated video with relevant backgrounds based on your script.
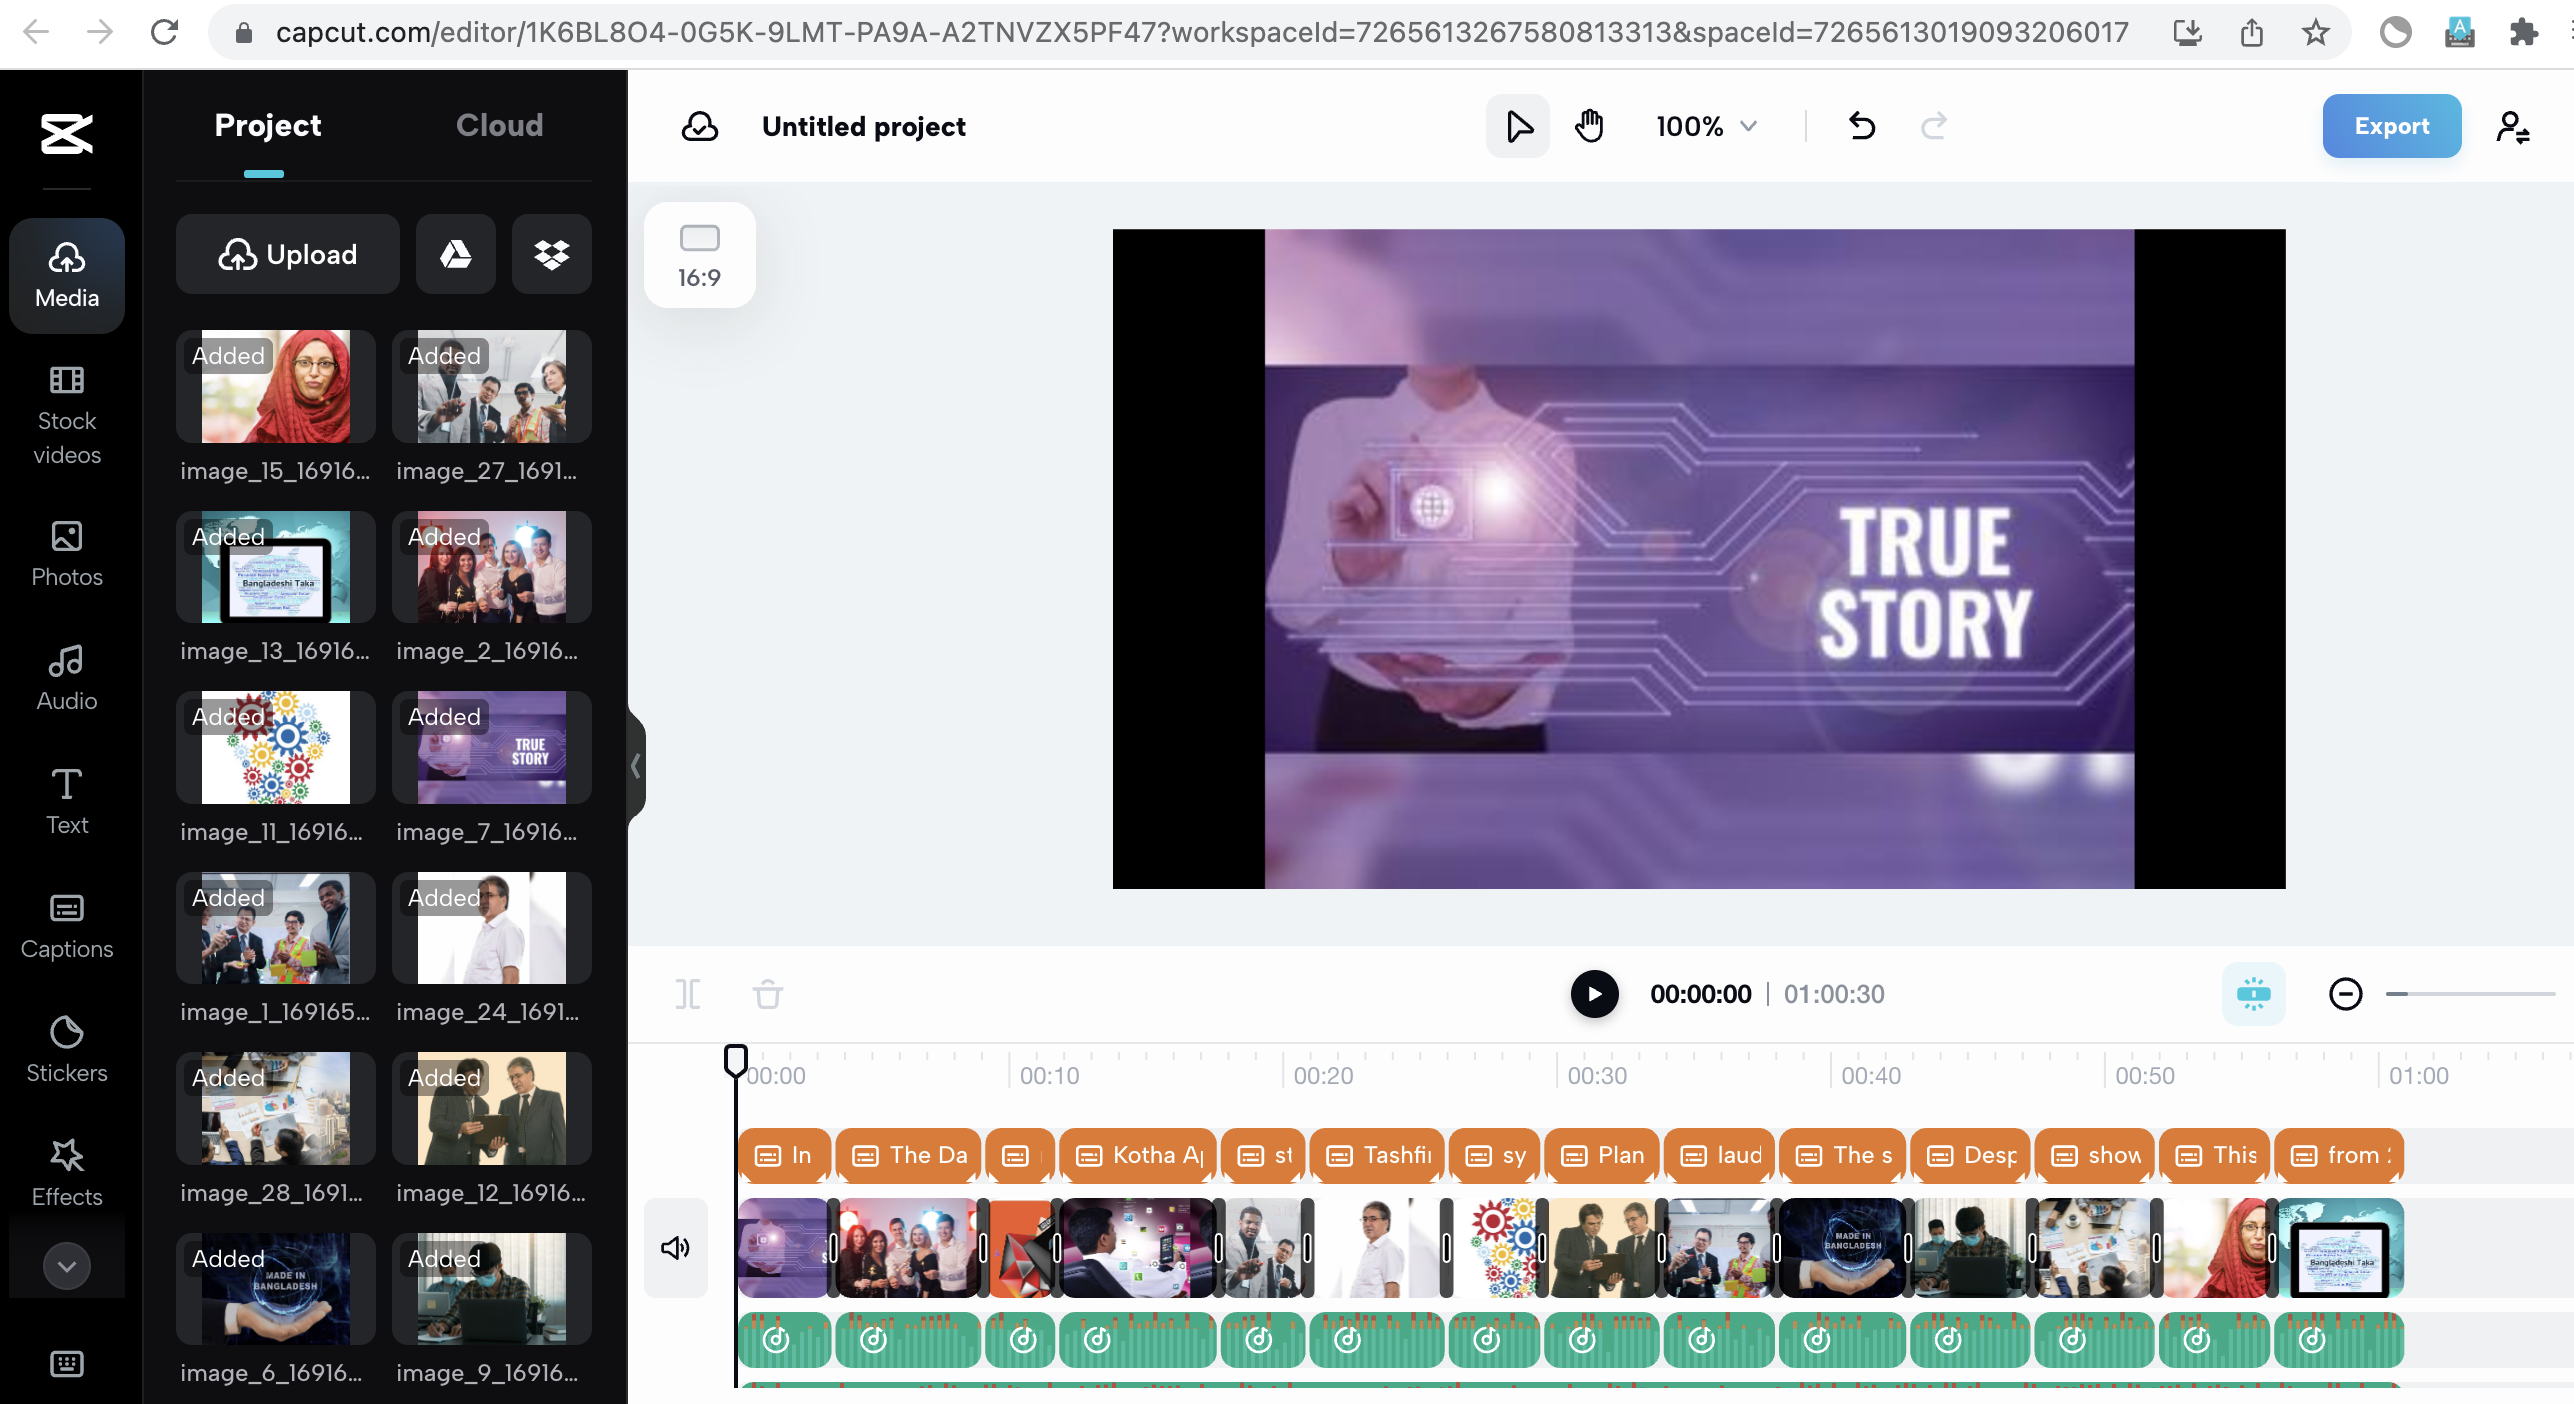
- Now that you are in CapCut editor, let’s dive into it. Note that it took me a while to figure out video editing, so like me experiment with it and you will figure out how you can edit extensively. Here are some basics:
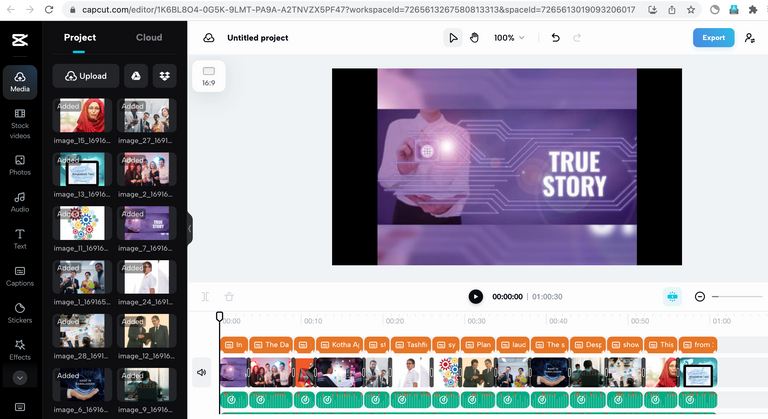
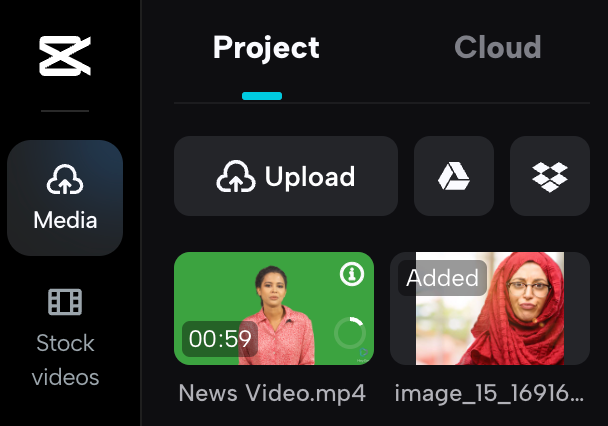
- First upload your generated AI Avatar video from left bar Media > Upload
- Click on the uploaded video or drag it to the timeline. I am not sure what it’s actually called, I call it timeline. These are basically different layers and you can drag one on top of another and extend it by dragging sides.
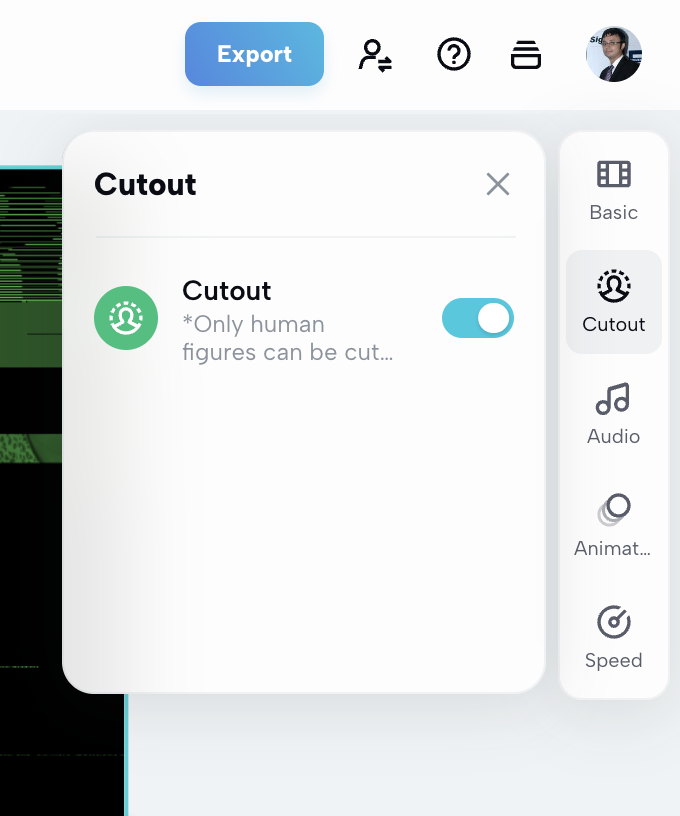
- Now click on your video and on right side menu, click on Cutout. Then turn on Cutout. It will take some time for the avatar to have transparent background.
- Since I have auto generated the video from ChatGPT CapCut plugin, I had some cleaning up to do. In the timeline, I selected the voice layer auto generated by CapCut and pressed delete, we already have voice with the video, so we don’t need it. I also didn’t like the auto generated images, so I selected the images in timeline and deleted them. And then upload images to add them.
- Now drag captions layer on top. Also if you add text layer, drag them on top as well. If you want a photo like background image to appear throughout the video, select the image in timeline and drag the side and extend it till the end of video. This is what I did for my background image, I didn’t want changing background.
- Now play around, add photo, delete photo, add animations (right side bar), add extra layers (by dragging in timeline), upload your photos and more.
- Once you are done, click on export and select 1080p and download your video.


There you have it. Your AI Video is ready to be published!
Step 5: Publish your video
- Go to the Youtube channel you have created in step 1.
- Click on create>Upload videos
- Give proper name and description and upload your video. Follow the steps and publish your video. Once published, share your link.
In conclusion
The landscape of content creation is evolving at an unprecedented rate, with AI playing a driving role. The ability to generate good contents without the traditional barriers like studios, cameras, or even extensive expertise democratizes the field, offering opportunities for everyone to express and innovate.
My experiment with AI video generation emphasises the fact that it’s not just the vast potential of AI in content generation, but also how accessible and user-friendly these tools have become. As we move forward, embracing these advancements could redefine how we create, consume, and perceive digital content. Whether you're a professional content creator or a curious beginner, the future of AI-assisted video creation offers limitless possibilities.
Any question or comment? tashfin@kotha.app, X: @tashfind